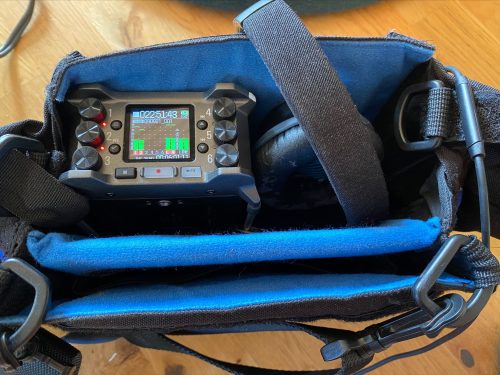
If you are one of us wanting maximum quality out of your work, adding a ZOOM F6 or a Sound-devices MicPre3 II to your gear-kit will help you manage recordings in 32-Bit Float and give you the superb possibilities for editing in post!
But myself is not a sound engineer and what I’ve learned so far about recording is through internet, feedback and hints from fellow recorders out there and fail and try again till it works! So with the Zoom F6 as well! This machine is of course not made explicit for bird-recorders, and is far beyond the advancement we normally trod into. But nonetheless it is a great recorder when you have set it up for your use, then you turn it on (On/Off-button: stupidly placed low behind the headphone 3.5 mm input) and push Record and stop when you leave the scene. That’s more or less it!
But from you wrap it out of the box till you can present it for your birds there are some work to be done, this I will guide you through!
A tip for free: Keep a set of AA’s in the battery compartment to make sure date/time-info is not deleted when changing batteries. You can run AA, Sony-type NP-F’s and Powerbank into USB-C simultaneously.
NB! One special issue compared with all other recorders I have had my hands on is that the KNOBS are NOT level in, they are always on full throttle and you have to reduce the input signal by turning it to the left!! And to be worse is that have to choose if the level should be adjusted during recording session or not, I have chosen NOT by setting INPUT>TRACK KNOB> REFERENCE LEVEL and as long as the recording’s going on (RED LIGHT) it will have the same level in what so ever you set the knob to! This makes actually sense since you do the final job adjusting on your computer at home!
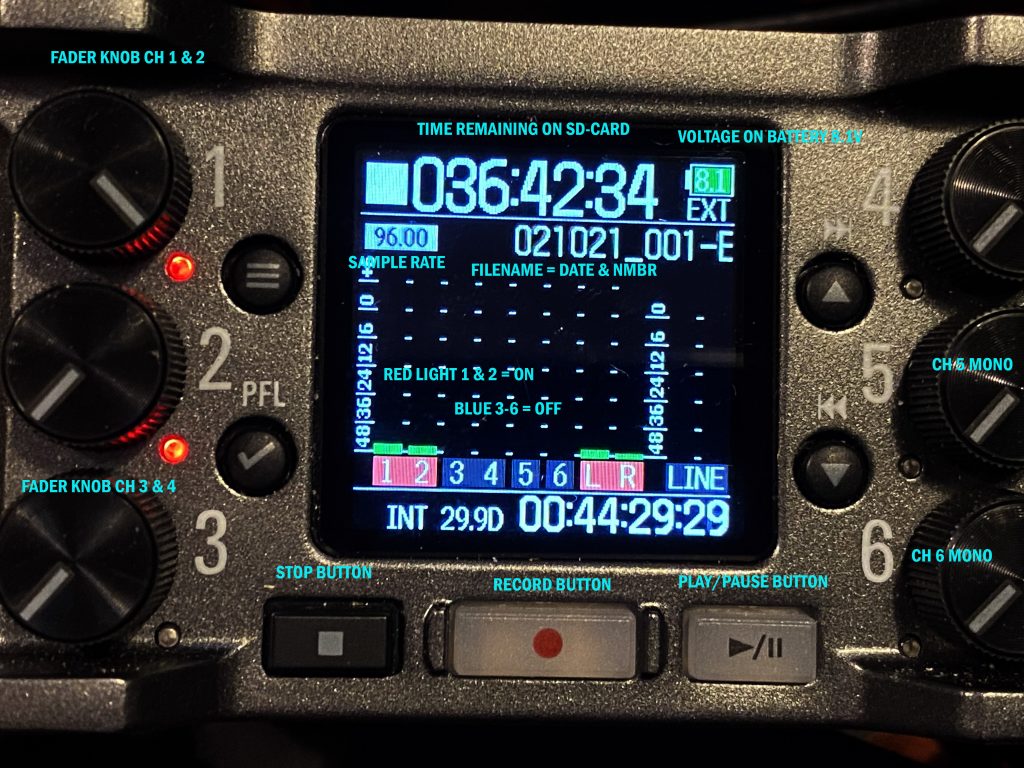
LINE OUT is disabled since I do not use it on cameras etc. See links in bottom for more info!
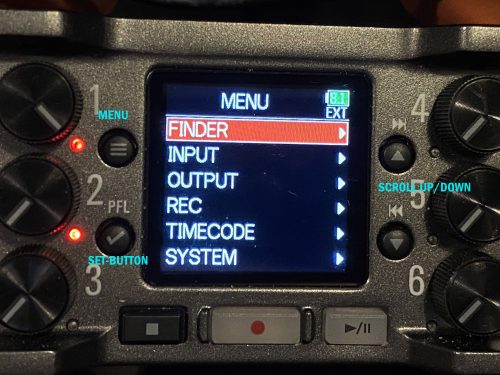
FINDER is where you find SD-card, performance, FORMAT etc.,

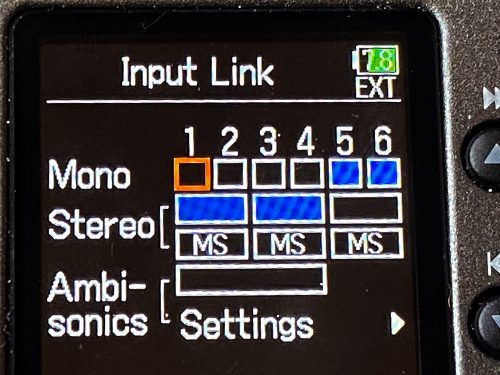
microphone you shall use. If you have a Stereo parabola, SASS etc. you have to set f.ex. both 1 & 2 for Phantom 48V.
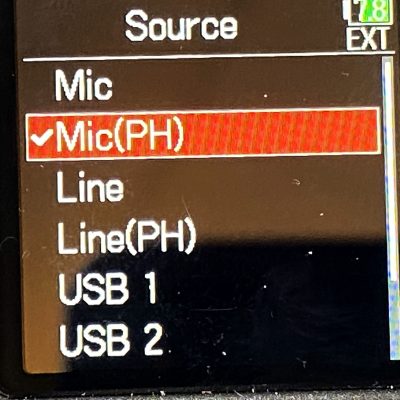
(this can be set in another menu) Since I use a Telinga MK2 Stereo I use Input 1 and 2 for this mic.
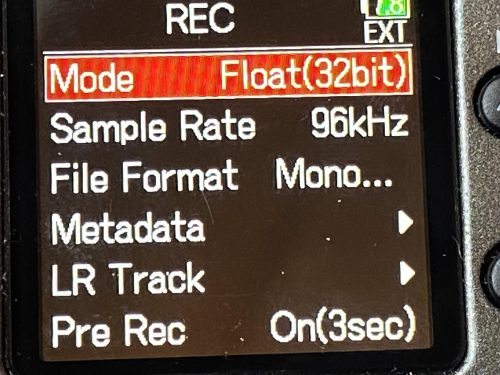
Sample rate I use 96 but possible till 192kHz.
File format: Mono/Stereo
L/R Track> ON(LR Only) This ensures you write a ready-made Stereo file into the SD-card. You can choose to save the Inputs separately.
Pre Rec ON(3 seconds) : ensures you will get the first 3 seconds of your lifer recorded till you manage to hit the Record-button
See example: https://www.fuglesang-troms.net/audacity-quick-guide/
Input 5 and 6 are separate MONO inputs with this setting shown on the picture.
Ambisonics: I do not have a clue!

You go to OUTPUT>Headphone out>Vol Curve> S curve
You might need to set Routing>L & R to get sound into your Headphones (Use PRE red triangles)
So bring your gear out and create some fantastic recordings!
SOME USEFUL LINKS:
Facebook «ZOOM F6 ONLY»-group: very skilled guys here!
George Vlad F6 review in-depth https://mindful-audio.com/blog/zoom-f6-recorder-review
Chris Spiegl Explains all about the knobs
Chris Spiegl Explains all about 32-bit float files
Curtis Judd Initial test and impression
Telinga https://www.telinga.com/
See also pages on: RECORDING and MIXPRE3 II Setup and power-options
NB! We are NOT affiliated with Zoom or any other brands mentioned in the article!
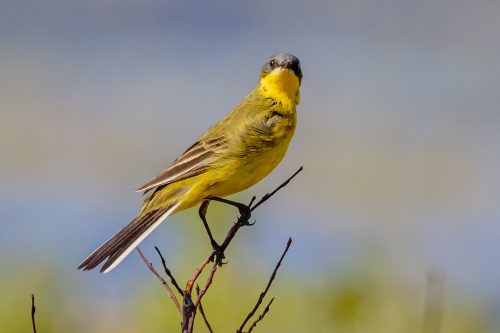
This actual bird is in the background in the recording below recorded with Mixpre3 II!